Get physical
Use components. Lay the groundwork of your application by dragging and dropping components from a library onto a diagram. Each component represents a physical part, like an accelerometer, a GPS, a servo, a LED, and other sensors and actuators. Be sure to tune the component's key parameters. Find the sweet spot of memory use and performance. And inject your custom code that handles the component's major events, like timer ticks, sensor updates, and button presses in a code-behind file.
Breaking-up the hardware dependencies
Decoupling: one of the most important steps towards long-term maintainability. That's why software and hardware are separated in Studio Technix by means of an abstract interface. The application is programmed against this abstract interface, which means that one board can easily be swapped in for another.
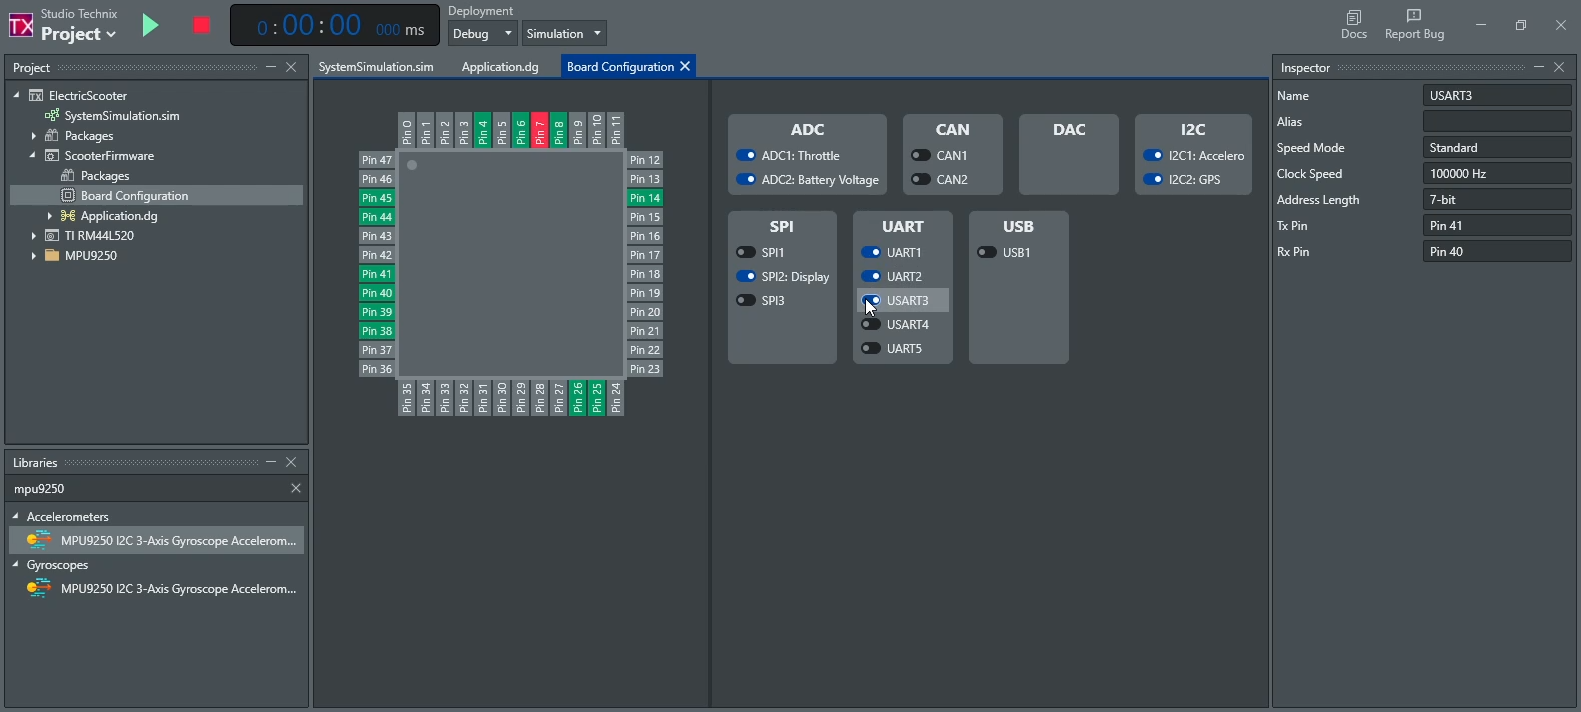
The board itself is configured with a graphical builder. Board-specific and peripheral-specific parameters are shown in the inspector and a pin-view keeps track of the used hardware pins and any conflicts.
Code with your own editor
We want freedom. Studio Technix is not a code editor, and does not aim to be one. Instead we let you use your own code editing tools. Love Notepad? Code with Paint? Go for it.
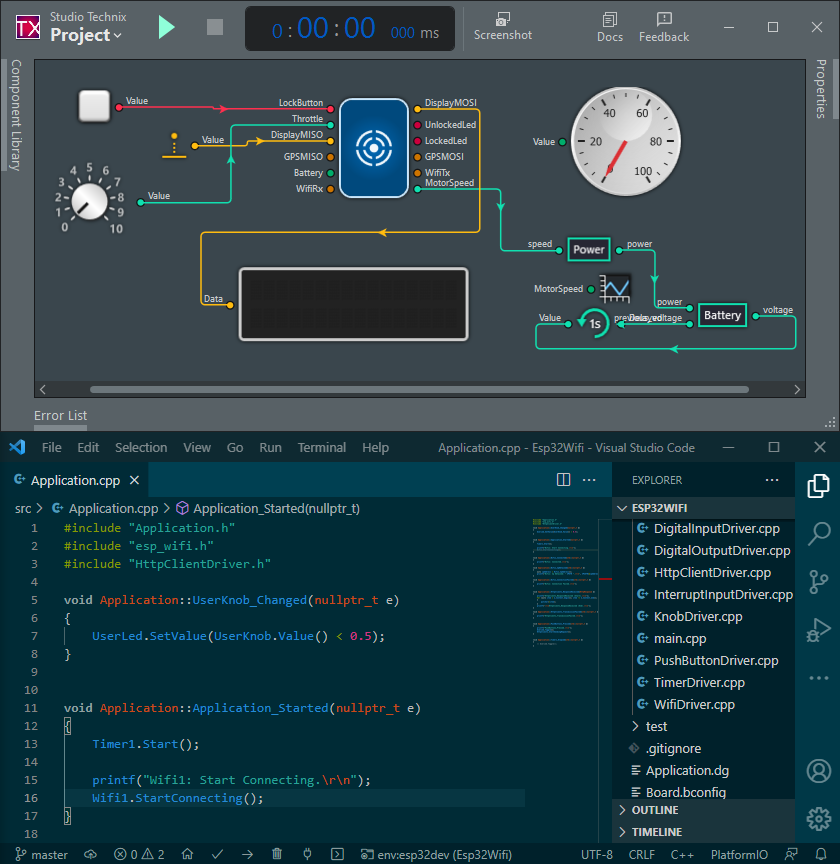
Adding a new component? Studio opens your editor. Double-click a component event handler? The editor jumps to the corresponding file and line of code. Parameter in the inspector requires code? That's right, code editor.
Studio Technix understands C++
Some changes can be done faster in code. So that's where you should do them. Everything that is displayed in Studio Technix originates in a code or text file. Components are just C++ classes. Component diagrams are C++ classes as well. If you modify a class, Studio Technix picks up the changes and updates the graphical interface accordingly.